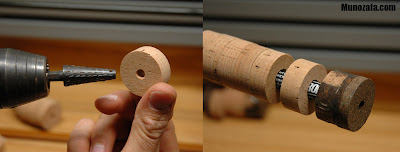
Cork is getting expensive these days, but I still buy the best quality that I can get my hands on. Here I drill both sides of the ring with what I call an angled "bur" bit. You can visualize the inside space being that of an hour glass, and the ring should be most snug in the middle allowing pace for epoxy between rings. The 10 piece cookie fixed (epoxied) on the blank is what we stack the rest of the rings against.

I apply epoxy with a popsicle stick, or tongue depressor (Whatever you want to call them). My left hand continuously rotates the blank counter clockwise so I don't have to be reaching around with the stick. I use epoxy sparingly, a dab on the blank, spread onto the face of the cork, push next ring down, and twist. You should see a small bead of epoxy around where the two rings touch. A lot of rod builders build their casting handles in one epoxy step. I recommend doing this in two steps. First the lower handle, and then the seat and upper handle. Unless you are mass producing or short on patience there is no reason to rush. Need I mention pianos again?

We use 20 or 30 minute epoxy for the handle assembly. 5 minute epoxy cures way too fast for this step, especially if you run into a problem, like not having your clamp set up before mixing the epoxy. Never clamp too tight because it is possible to break a ring. I usually leave my handles in the clamp over night, but a few hours will do if you need to turn it on the lathe the same day. That's right, the lathe is next!
